It’s been less than 48 hours hours (at the time of writing this) since ChatGPT’s API was launched to the public, and I’ve been itching to write this guide ever since.
Contents
This article will show you exactly how to integrate ChatGPT with Google Sheets, including a free script you can use in your own Google Sheet today!
What Does the ChatGPT API Mean For Us?
In short, we can do more with it, such as:
- Faster responses from ChatGPT (the website is often slow)
- Sending multiple prompts at once (the web interface for ChatGPT only allows one prompt at a time)
- Integrate ChatGPT with third party tools, including custom-made apps and existing tools like Google Sheets
SEO Professionals, digital marketers and data analysts love Google Sheets. It’s extremely flexible as you can connect your spreadsheets to external services using JavaScript in an Apps Script file.
There are already dozens of different Google Sheets that have been integrated with OpenAI’s API, but until now, we couldn’t connect it directly to ChatGPT, but now we can!
Get Your Ready Made Google Sheet Right Here
If you want a ready-made, ready-to-use Spreadsheet with NO CODING what-so-ever AND loads of extra features, you can get the ready-made version right here!
How To Integrate ChatGPT With Google Sheets 👇
Follow this step-by-step guide:
Step 1: Get An OpenAI API Key
Before getting started, you’ll need an OpenAI API Key.
You can get one from OpenAI’s website, which comes with $18 worth of free credit (enough to generate approximately 670,000 words).
After that, the cost is $0.002 per token. You can generate approximately 750,000 words for $2.
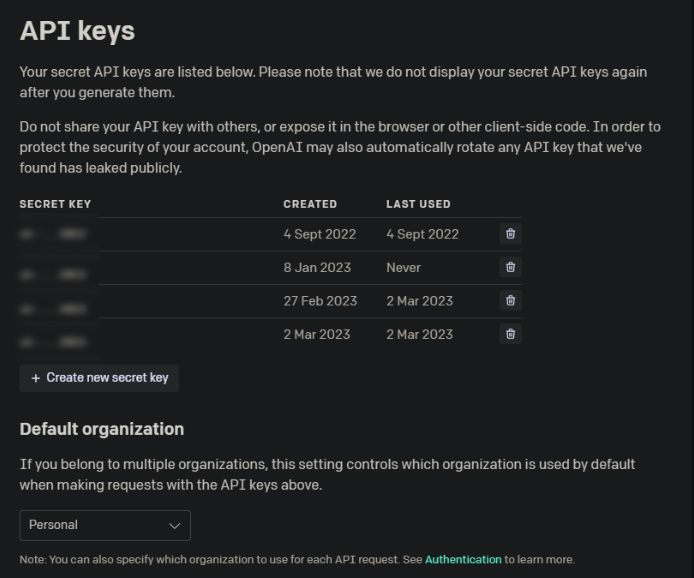
Once you click ‘Create a new secret key’ – you will only be shown it once, so copy and save it right away, or you’ll have to create a new one.
Step 2: Open a New Google Sheet
Make sure you’re signed into your Google account, then visit sheets.google.com and create a new blank sheet.
This is the easy step!
Step 3: Create An Apps Script
In the Google Sheets menu, go to Extensions > App Script
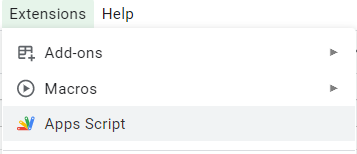
You should see the blank file which will open itself in a new tab:
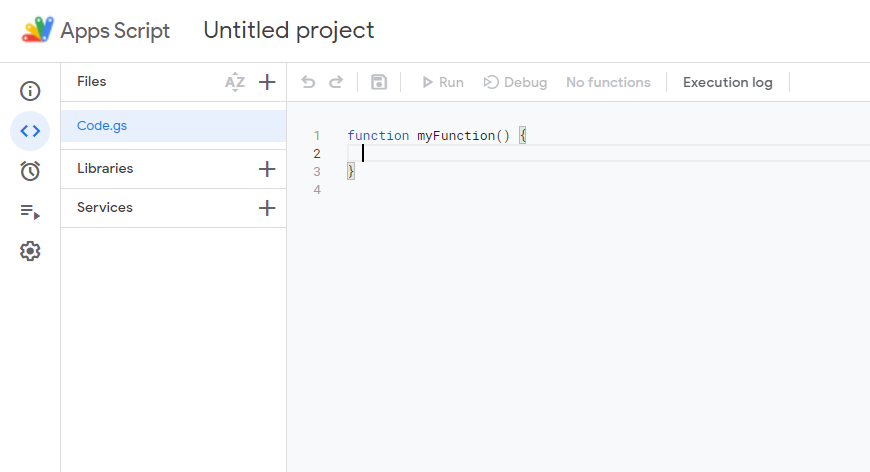
Step 4: Create Your Apps Script Code
Luckily, this is the part I’ve done for you!
Delete all of the existing text in the new Apps Script file that says function myFunction() and the pair or curly brackets.
Paste in the following code:
If you cannot see the code – view it on GitHub instead (opens in a new tab).
Step 5: Deploy The Apps Script
Use the blue Deploy button in the top right corner.

You should see this:
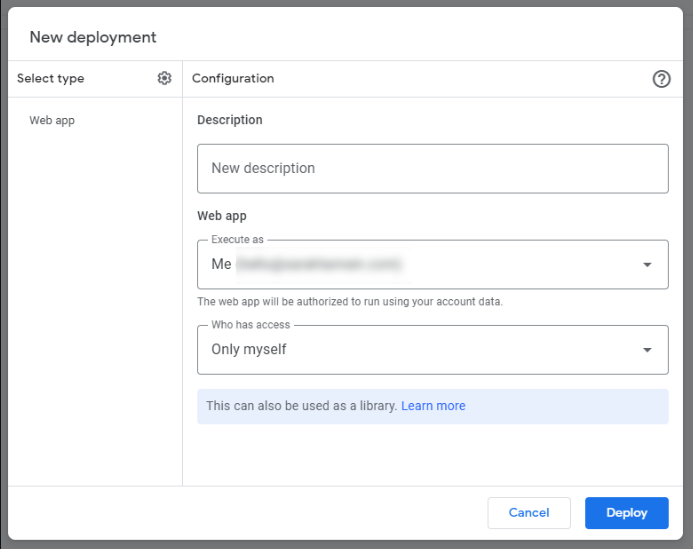
You can enter a description if you like, then click deploy.
It may ask you to sign-in to Google again to authorise the script to run.
Step 6: Add Your OpenAI API Key to Google Sheets
There are two ways to do this, both of which are possible with the code provided in the Gist above.
Method #1 – Quick & Easy
On line 29 of the Apps Script file, find YOUR_API_KEY and replace it with your API that you got in step 1.
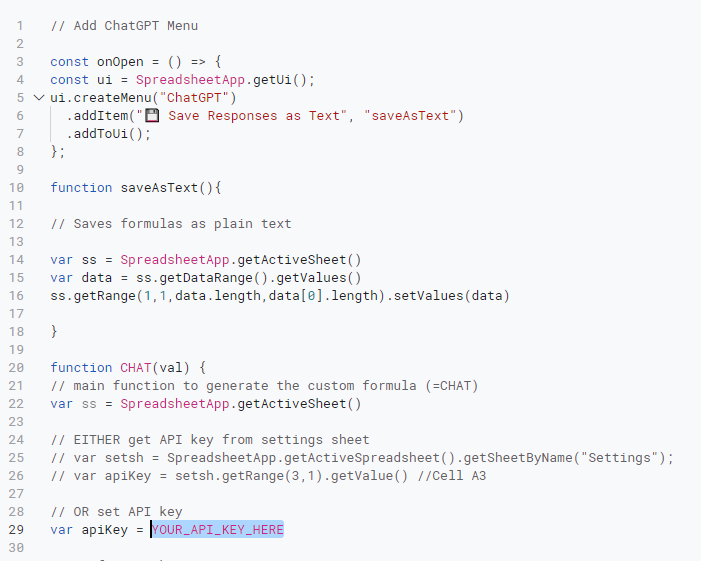
If you use this method, you should not share your Google Sheet with others, as this will also share the Apps Script file that contains your API Key.
You should not share your API key with anyone, as they can abuse all your credits and potentially cost you money.
Only use this method if you do not plan to share your sheet or Apps Script with anyone else.
Method #2 – Slightly More Effort
This method is much better if you want to share your spreadsheet or create copies of it for others to use with their own API key without having to edit the code.
First, create a new page within your existing sheet and call it settings

Within that new settings page, paste your API key into the cell A3, adding an optional label(s) if required:

Make sure this is in the ‘Settings’ sheet or it won’t work!
Finally, delete the double forward slashes from the start of lines 25 and 26 or the Apps Script File and add double slashes to the start of line 29.
It should look like this:

This is telling the script to take the API key from cell A3 of the Settings sheet that you just made.
Step 7: Get Prompting!
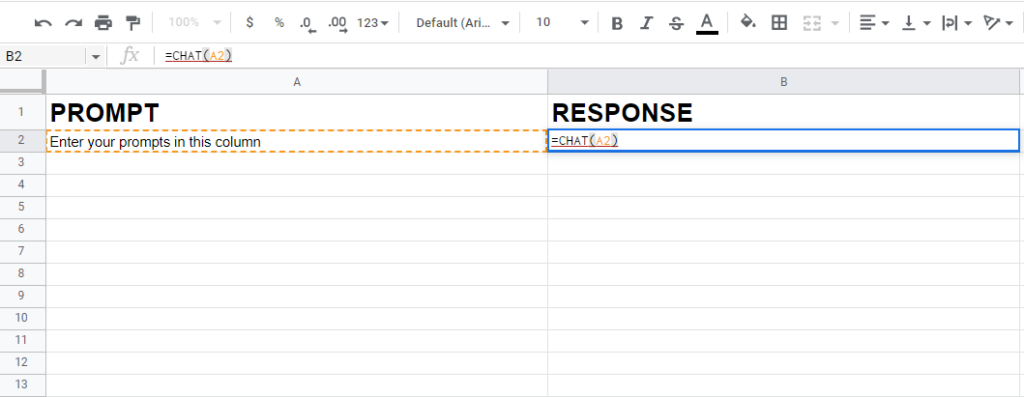
In a blank page on your sheet (NOT the settings one…) create two column headers called PROMPT and RESPONSE.
The PROMPT column is where you will type your prompts for ChatGPT and the response will appear in the RESPONSE column.
In order to generate responses, type a prompt into Column A and use the formula =CHAT(A2) to generate a response for that prompt.
If you want to save all of your formulas as text instead of formulas so you can edit them easily, use the new button in the Google Sheets menu “Save Responses As Text”

Get Your Ready Made Google Sheet Right Here
Remember, you don’t have to faff about with code if you don’t want to! I’ve done the hard work for you and put together a ready-to-go Google Sheet that you can start using within a couple of minutes!
Also includes extra formulas with carefully engineered prompts which are constantly being refined:
=CHAT()
=ELI5()
=SUMMARIZE()
=ANALYZE()
=QANDA()
=REWRITE()
Final Thoughts & Optional Extras
If you want, you can edit the contextual prompt within the Apps Script file on line 45 to better suit your needs.
This is the contextual prompt I’ve used, that you can easily change:

The prompt reads: “You are an experienced content writer with high levels of expertise and authority. Your job is to write content that will be published online on websites. [Your writing style is friendly, conversational using informal grammar and sometimes non-standard English – as if you’re talking to a friend, while incorporating rhetorical questions, storytelling, metaphors and analogies.] I will provide you with a topic or series of topics and you will come up with engaging and educational copy for this topic.”
Learn more about contextual prompting here.
With this ChatGPT + Google Sheets integration, you can automate repetitive writing tasks, summarise information, automate questions and answers plus loads more!
Stop waiting around for ChatGPT 😅
Enjoy!

