CloudFlare is an incredibly popular tool for website owners. It provides an array of handy services that protect your website and make it load faster too – it’s a win-win! One of the most sought-after features of CloudFlare is its coveted Web Application Firewall – WAF for short.

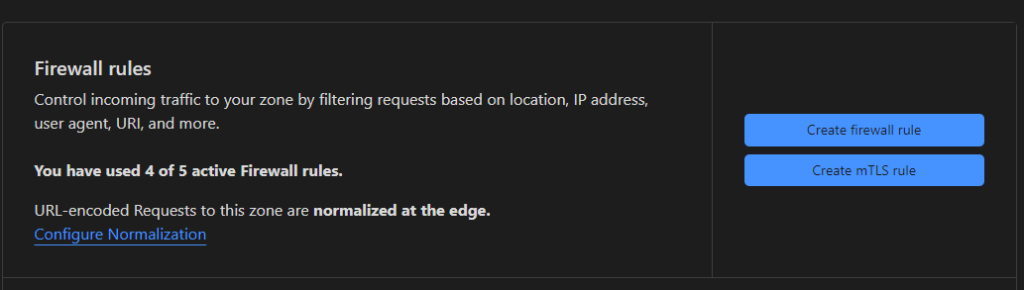
Until recently, use of the Firewall was limited only to paying ‘Pro’ plan customers but since March 2022 – the Firewall is now free for everyone (with a limit of 5 Firewall rules per site)
Let’s explore how to use CloudFlare’s FREE Firewall service to protect your WordPress site – specifically the admin area from bad bots.
The Firewall is only one of the great benefits of using CloudFlare – you also get:
- Faster DNS Edge Caching
- Enhanced privacy for your DNS records which are proxied behind CloudFlare and don’t expose your real web server’s IP address
- Global Content Delivery Network (CDN) – making your site faster for international visitors
- Optimization of code by minifying HTML, CSS and JavaScript
- Traffic analytics and statistics
- Universal SSL Certificate
- “Always-Online” Technology – if your site goes down, CloudFlare can keep a cached version online for you.
- Other security features that block bad bots before they can obliterate the resources at your web host.
How to use the Web Application Firewall in CloudFlare to Protect WordPress
There are 1-2 main URLs you need to protect in WordPress; these are:
- The login URL
- The admin URL
However, if you are to block access to /wp-admin/ outright you actually risk harming your site because you need to allow the ajax URL or parts of your site could potentially stop working!
Remember that Firewall Rules are NOT the same as the 3 page rules you get in CloudFlare. The 5 WAF rules are totally separate to your 3 free page rules, so don’t worry if you’re already using those!
Why Should you use a Web Application Firewall for WordPress?
Because WordPress websites have a huge target stuck on them. WordPress websites are infamously unmaintained, running on extremely low-budget hosting packages with overloaded, unbalanced servers and security is certainly not at the front of their mind.
As so many WordPress sites use third party plugins that aren’t always kept up-to-date, hundreds of PHP back doors exist in WordPress plugins that site owners are not aware of.
By using a Firewall such as CloudFlare, you’re protecting your website from bad bots and malicious traffic before they even reach your server. CloudFlare protects your hosting resources by stopping malicious traffic using too much computing power that prevents your genuine visitors from having a good experience.
If you’re on metered hosting where you’re charged per GB of bandwidth, then CloudFlare could be saving you dollars and pounds too!
First, Allow your own IP Addresses
You don’t want to get yourself blocked from your own WordPress dashboard, do you? No. You absolutely do not.
So the first of your 5 free Firewall rules should go to whitelisting yourself. This should include all your own Home and Office IP addresses, as well as the IP addresses of your team who also need to access your website.
In CloudFlare, navigate to Security > WAF > Add New Firewall Rule 👇🏻
For this Firewall rule, you have to give it a name which can be anything you like. Then choose ‘IP Source Address’ in the Field dropdown and ‘equals’ in the Operator dropdown.
Then enter your IP address in the ‘value’ field and choose ‘Allow’
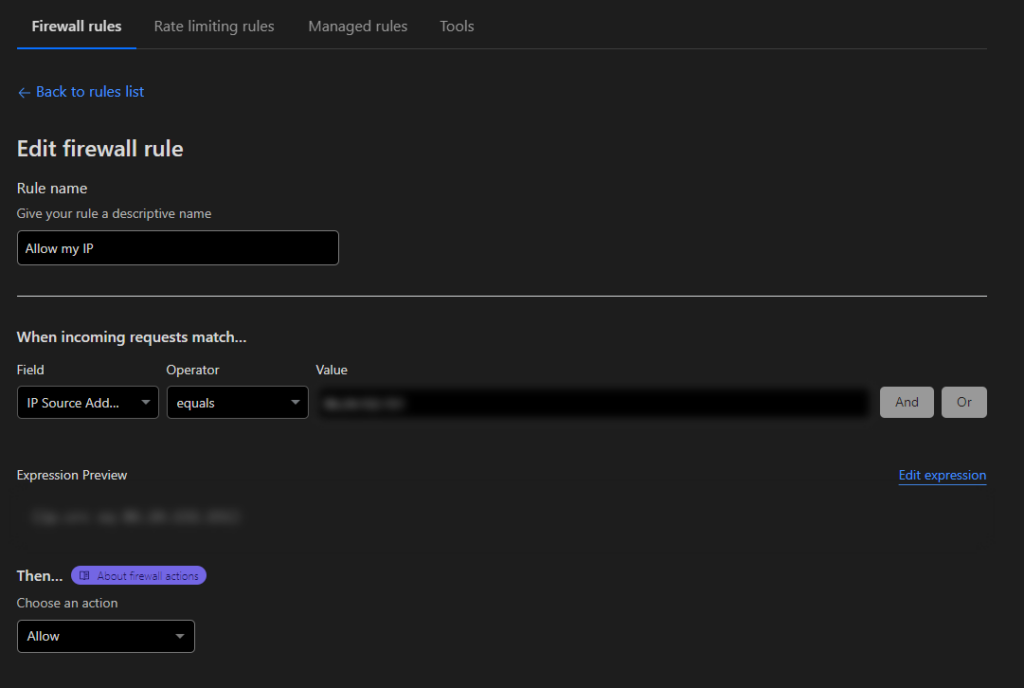
Make sure you save this rule and then continue.
Ensure AJAX Requests are not Blocked by the Firewall
AJAX stands for Asynchronous JavaScript And XML. In non-techie speak – it’s the thing that allows new content to appear on webpages without needing to refresh the page.
You know when new content appears on Facebook even though you didn’t refresh the page? That’s AJAX. It’s in use on most websites, WordPress uses it and your site could stop functioning properly without it.
This is why we always allow AJAX requests.
Like the previous step, only this time instead of choosing ‘IP Address’ choose URL Path. Enter the value as /wp-admin/admin-ajax.php. Choose allow to make sure it’s never blocked.

Block Access to Sensitive WordPress URLs (Admin, Login, etc)
Now we get to the good stuff – the blocking. As mentioned previously, these URLs are subject to attack because they give access to the entire admin dashboard which is exactly what a hacker wants.
- The login URL
- The admin URL
There’s also another file that’s frequently used by malicious hackers to gain unlawful access to WordPress sites. It’s called:
- xmlrpc.php
If you do block access to this file, then be aware that services like the Windows WordPress Editor or the WordPress Mobile Phone app will no longer work. XMLRPC allows admin access to your website in a non-secure way.
WordPress offers a much more secure way to remotely connect (its built-in RESTful API) so XMLRPC is no longer needed. It’s a security risk to leave it enabled. It can be blocked using CloudFlare.
To block these, create a new CloudFlare Firewall Rule with these conditions:
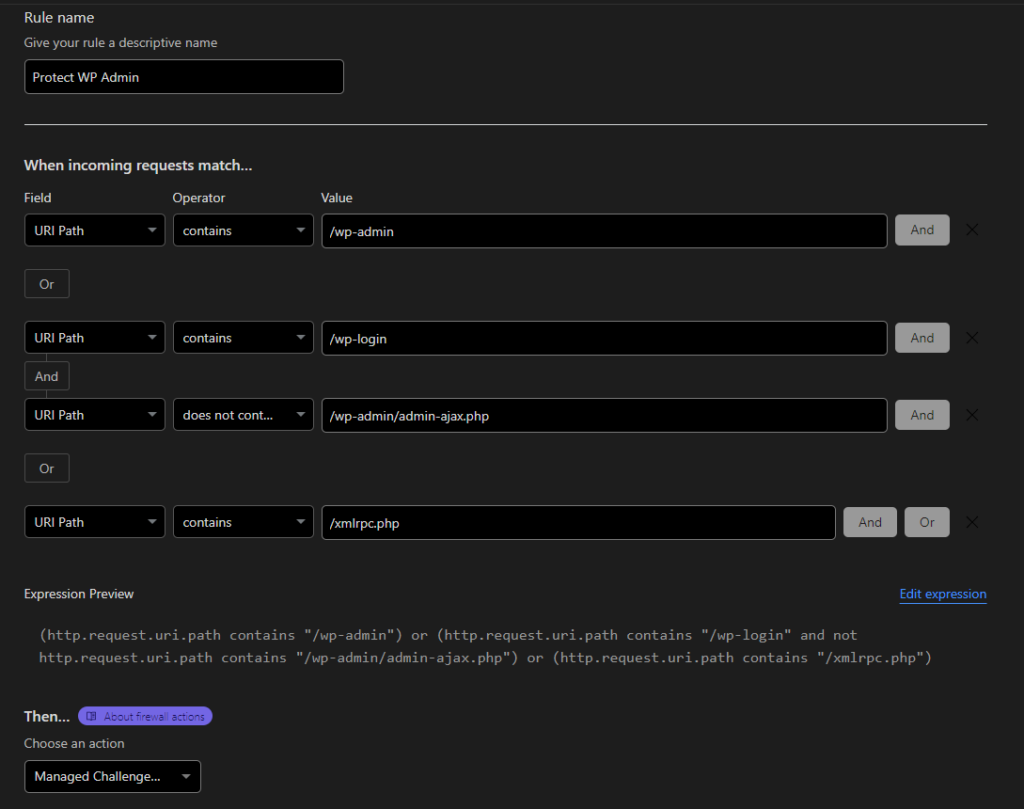
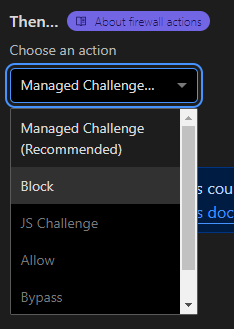
Here, you may choose ‘Managed Challenge’ or ‘Block’ entirely – it’s up to you how strict you want to be.
So, those are the main rules to configure in CloudFlare’s Free Firewall that you can use to block the majority of bad or malicious traffic to your website.
However, there are still other things you can do at the host as a secondary layer of security to protect your site.
Other Methods to Keep your WordPress Site Secure
You can use your website’s nginx config or .htaccess file to block access to:
- xmlrpc.php
- Directory browsing on the server
- Author scans
- The WordPress Login Page
WordPress has more documentation about this on their WordPress Hardening page.
You should also ensure that your webhost uses standard security measures such as fail2ban and/or Mod_Security on the server itself. These security implementations are crucial to keeping your website safe alongside the protection offered by CloudFlare’s WAF.
You can also take additional steps such as:
- Limiting login attempts to 2 every 5 minutes using a PHP Function
- Using randomly generated, complex and unique passwords for all user logins to your site
- Enabling 2-Factor Authentication for your WordPress Admin area if possible
- Regularly rotating the hashes and salts in the WordPress config file, you can get a new set anytime from WordPress
- Keeping WordPress up-to-date
- Keeping all your third-party plugins and themes up-to-date
- Ensuring your server is running the latest version of PHP
- Taking regular daily backups of your website
- Rotating the MySQL and (S)FTP passwords at the host
- Having regular security audits of your website
- Stay up-to-date to website security issues